
Creating a scratch org, dev org or even a sandbox today is a pretty fast and simple action. The newly created organization has only metadata ready-to-use and it has no real data. It’s cumbersome to create data manually. This tool will help you tremendously by reducing your effort and time.
Found a solution to this problem. The solution is called SFDMU Plugin, the easiest way to migrate org data.
Why is the SFDMU Plugin the best solution?
It provides the most convenient way to export data from multiple related sObjects between Salesforce orgs (even unlinked). Unlike other similar tools it can easily and quickly perform all important operations like: INSERT / UPDATE / UPSERT / DELETE.
The Highlights of the tool:
- Supports direct data migration from Salesforce org to another Salesforce org without intermediate CSV files.
- Allow to migrate multiple objects at once.
- Supports data Export/Import to/from CSV files.
- Does not require a special External Id field for Update/Upsert operations to bind related SObjects. Any type of field with unique values, such as a Name, even formula or auto-number can be used as External Id. The Plugin internally compares the records from the Source and Target based on the specified field and performs the necessary CRUD operations on the Target.
- Handles circular references between SObjects, for example when Object1 has a child relationship to Object2, then the Object2 has a child relationship to Object3 and the Object3 has a parent relationship back to the Object1.
- Supports customized Fields and Object Mapping, when the name of the objects and fields in the Source and the Target are different.
- Supports data migration preserving Record Type for each record.
- Handles self-referenced fields, for instance Account.ParentId.
- Supports composite external Id keys.
- Full Person Account support. Can process record sets contain mixed Business & Person Accounts.
- Supports migration of related Note & Attachment objects, including the binary data.
- Supports record owner assignment. If the source and the target orgs have the same list of users it can assign each record to the owner with the same Name Owner.Name (User.Name) External Id key.
- Has built-in data anonymization feature to replace real source data (for example from the Production environment) with random values during updating the Target.
- Automatic CSV source file transformation option.
- Customized binding of polymorphic lookup fields, for instance FeedItem.ParentId.
- Secured and safe. All operations are performed on the client’s machine, there is no cloud interaction, so all is completely safe.
- User-friendly configuration. Fully configurable using simple JSON file.
- Fast performance. Processes only a selected subset of records and fields that need to be inserted or updated and does not touch others.
Installation:
Prerequisites:
Before using this plugin you need to perform standard procedure of installing SFDX CLI on your local machine from here:
Installation as SFDX plugin:
# If you already have outdated version of the Plugin installed on your local machine

# and want to update it, first uninstall the existing version:

$ sfdx plugins:uninstall sfdmu

# Install the latest version of the Plugin:

$ sfdx plugins:install sfdmu
Installation with the source code:
# If you have any old Plugin installation, take some preliminary steps

# before installing from the current git source.

# Uninstall all previously installed SFDMU instances from the SFDX CLI.

$ sfdx plugins:uninstall sfdmu

# If once you have linked any old source code of the Plugin, make sure that it is already

# unlinked from the Salesforce CLI.

# Go to your local directory which contains the old Plugin sources and type:

$ sfdx plugins:unlink

# Now you are ready to install the new version of the Plugin from the current repository.

# 1. Clone the git locally:

$ git clone https://github.com/forcedotcom/SFDX-Data-Move-Utility

# 2. Make the installation directory current:

$ cd SFDX-Data-Move-Utility

# 3. Install npm modules:

$ npm install

# 4. Link the Plugin to the Salesforce CLI:

$ sfdx plugins:link
Sample run:
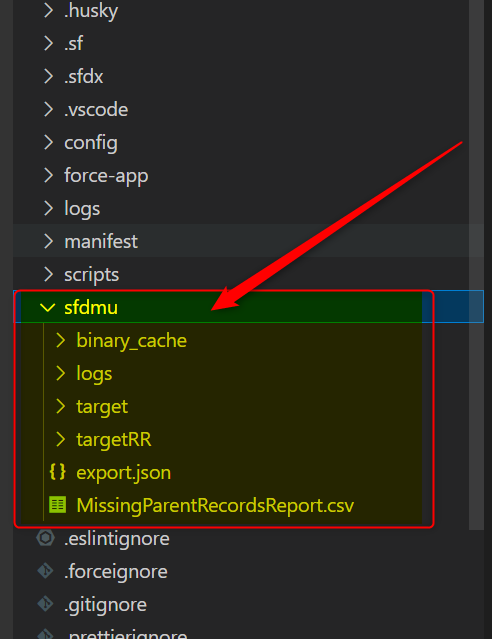
After this is installed you will see a folder in your VS Code called “sfdmu”
Use the export.json file to query the data and use it in migration. Below is an example command for a run.

sfdx sfdmu:run -s <sourceorg> -u <targetorg> -p sfdmu
sourceorg: The pre authenticated salesforce org using sfdx
targetorg; The pre authenticated target org using sfdx
Watch the demo : https://www.youtube.com/watch?v=KI_1vD93prA
Conclusion
This is the end of this post for now. But if you have any issues using the SFDMU tool, please free to connect and comment. I will definitely try to resolve the issues. Hope this post help someone in need 🙂 Till the next time , keep reading and keep sharing ….
References : https://help.sfdmu.com/quick-start

Leave a Reply